If you’re new to FL Studio, you may be wondering how to record patterns in the software. Recording patterns is an essential part of music production, and it can be done easily in FL Studio. Whether you’re working with MIDI or audio, FL Studio provides a variety of tools to help you record and edit your patterns.
To get started, you’ll need to select the pattern you want to record into. You can only record into one pattern at a time, so make sure you have the right one selected. Once you’ve selected your pattern, you can start recording. FL Studio provides a variety of recording modes, including step recording and real-time recording, so you can choose the one that works best for you.
recording patterns in FL Studio is a straightforward process that can be done quickly and easily. With a bit of practice, you’ll be able to create complex patterns and arrangements that sound great. Whether you’re a beginner or an experienced producer, FL Studio has everything you need to take your music to the next level.
Understanding FL Studio Interface
FL Studio is a powerful digital audio workstation that allows you to create, record, mix, and master music. The interface is user-friendly and designed to be intuitive, making it easy for beginners to get started. Here are some key features of the FL Studio interface:
-
Channel Rack: This is where you can add and arrange different instruments and effects. You can also use the Channel Rack to create patterns and loops.
-
Playlist: The Playlist is where you can arrange your patterns into a full song. You can also add audio clips and automate effects.
-
Mixer: The Mixer is where you can adjust the levels, panning, and effects of each individual track. You can also add send tracks and group tracks for more complex mixing.
-
Browser: The Browser is where you can access your samples, presets, and plugins. You can also use the Browser to search for specific files and folders.
-
Toolbar: The Toolbar contains various tools and options for editing and arranging your project. You can also use the Toolbar to access the Piano Roll, Step Sequencer, and other editing tools.
Whether you’re using FL Studio on Windows or macOS, the interface is designed to be consistent and easy to navigate. You can customize the layout and color scheme to suit your preferences, and there are plenty of online resources available to help you learn more about using FL Studio.
Setting Up FL Studio
Setting up FL Studio is a crucial step in recording patterns. Before you start recording, make sure you have the right tools and settings in place. Here are a few things you need to do before you start recording.
Choosing the Right DAW
FL Studio is a great DAW for recording patterns. It offers a user-friendly interface, a variety of tools, and a lot of flexibility. If you are just starting out, FL Studio is a great option. However, if you are already familiar with other DAWs, you can use them too.
Checking Compatibility
FL Studio is available for both Mac and Windows. Make sure you have the right version installed on your computer. Also, make sure your computer meets the minimum requirements for FL Studio. You don’t want to have any compatibility issues when you start recording.
Setting Up Audio
Before you start recording patterns, make sure your audio settings are correct. Go to the audio settings in FL Studio and choose the right input and output devices. Make sure your microphone or instrument is connected properly. You can also adjust the buffer size and sample rate to match your needs.
Creating a New Project
Once you have everything set up, create a new project in FL Studio. Choose the right settings for your project, such as the tempo and time signature. You can also choose a template to get started quickly.
Familiarizing Yourself with FL Studio
Before you start recording patterns, take some time to familiarize yourself with FL Studio. Learn how to navigate the interface, use the tools, and customize your workspace. This will help you work more efficiently and get better results.
By following these steps, you can set up FL Studio for recording patterns. With the right tools and settings in place, you can focus on your creativity and produce great music.
Creating a New Project
When starting a new project in FL Studio, the first step is to open the software and create a new project. This can be done by clicking on “File” in the top left corner of the screen and selecting “New” from the drop-down menu.
Once you have a new project open, you will see the Channel Rack and the Playlist on the left side of the screen. The Channel Rack is where you can add and organize different instruments and samples, while the Playlist is where you can arrange your patterns and create your song.
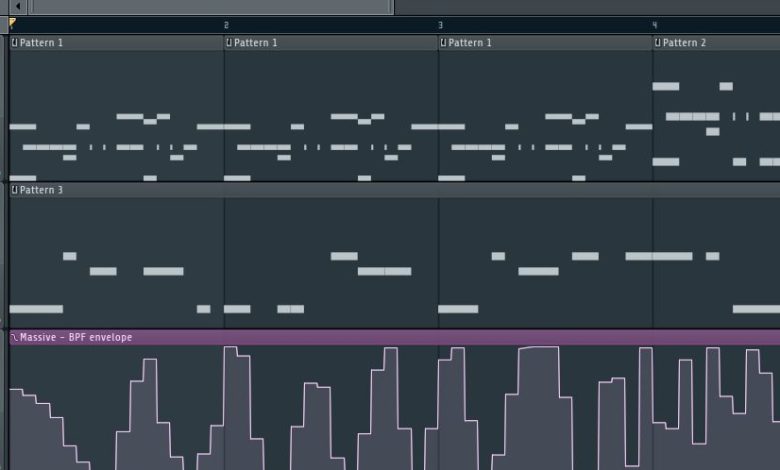
To start creating a pattern, you can either double-click on an empty space in the Playlist or right-click and select “Insert > Pattern” from the drop-down menu. This will open up the Piano Roll, where you can create your melody or drum pattern.
In the Piano Roll, you can select different notes and adjust their length and velocity by dragging them up or down. You can also use the paintbrush tool to quickly add notes to the pattern.
Once you have created your pattern, you can drag it from the Piano Roll into the Playlist to add it to your song. You can also copy and paste patterns within the Playlist or between different projects.
creating a new project in FL Studio is a simple process that involves opening a new project, organizing your instruments and samples in the Channel Rack, and arranging your patterns in the Playlist. With a little practice, you can quickly create professional-quality patterns and songs in FL Studio.
Recording Patterns
Recording patterns is an essential part of producing music in FL Studio. It allows you to capture your ideas and create loops that you can use in your tracks. In this section, we will go through the steps to record patterns in FL Studio.
First, select the pattern you want to record into. You can only record into one pattern at a time. You have two options for recording your MIDI data: in pattern mode, the MIDI data will be recorded into the currently selected pattern and appear in the selected channels piano roll. Alternatively, in the song mode, the MIDI data will be recorded into the song playlist and appear in the selected channels playlist.
To start recording, click the record button in the transport panel or press the record shortcut key. Once you have finished recording, press the stop button or use the stop shortcut key to stop the recording.
To play back the recorded pattern, select the pattern you just recorded into and press the play button in the transport panel or use the play shortcut key.
To loop the recorded pattern, right-click on the pattern in the channel rack and select “Loop” from the drop-down menu. This will loop the pattern until you stop it.
If you want to record audio instead of MIDI, you will need to associate a playlist track lane with a mixer track. You can do this by right-clicking the playlist track header and selecting “Track Mode” > “Audio Track” > “Insert” (link to the desired mixer track). Then, arm the mixer track by clicking on the disk recording icon.
recording patterns in FL Studio is a straightforward process that involves selecting the pattern, starting the recording, and stopping the recording. You can loop the pattern and record audio in a similar way. With these steps, you can capture your musical ideas and create loops that you can use in your tracks.
Editing and Arranging Patterns
Once you have recorded your patterns in FL Studio, you can edit and arrange them to create a complete song. The Playlist window is where you can arrange your patterns by placing them in the order you want them to play.
To edit a pattern, simply double-click on the pattern clip in the Playlist. This will open the Piano Roll window, where you can edit the note data of the pattern. You can also use the Piano Roll to add new notes, delete existing notes, or adjust the timing of the notes.
In addition to editing note data, you can also edit event data in the Piano Roll. Event data includes things like volume changes, panning, and effects. To edit event data, simply click on the event you want to adjust and use the tools in the Piano Roll to make your changes.
Once you have edited your patterns, you can arrange them in the Playlist. To do this, simply drag and drop the pattern clips to the desired location in the Playlist. You can also use the Insert button to insert new pattern clips into the Playlist.
In addition to pattern clips, you can also use audio clips in the Playlist. Audio clips are recordings of audio that you can use to add additional elements to your song. To add an audio clip, simply drag and drop it into the Playlist.
editing and arranging patterns in FL Studio is a simple process that allows you to create complex and dynamic songs. By using pattern clips, audio clips, and event data, you can create unique and interesting music that stands out from the crowd.
Using the Piano Roll and Step Sequencer
FL Studio offers two ways to record patterns: the Piano Roll and the Step Sequencer. Both options provide a user-friendly interface for recording MIDI notes and sequences.
Piano Roll
The Piano Roll is a graphical representation of a musical score, where each note is represented by a colored rectangle. To access the Piano Roll, simply click on the channel selector for the instrument you want to use and select the Piano Roll option.
Once you have accessed the Piano Roll, you can begin recording by selecting the record button on the transport panel. You can then use your MIDI controller to input notes into the Piano Roll. If you don’t have a MIDI controller, you can also use your computer keyboard to input notes.
The Piano Roll also allows you to edit your recordings by adjusting the length and velocity of each note. You can also use the quantize function to snap notes to a grid, making your recordings more precise.
Step Sequencer
The Step Sequencer is a grid-based interface that allows you to create step sequences by inputting MIDI notes. To access the Step Sequencer, simply click on the channel selector for the instrument you want to use and select the Step Sequencer option.
Once you have accessed the Step Sequencer, you can begin recording by selecting the record button on the transport panel. You can then use your MIDI controller to input notes into the Step Sequencer. Alternatively, you can use the step input function to input notes using your computer keyboard.
The Step Sequencer also allows you to adjust the length and velocity of each step, as well as the overall tempo of your sequence. You can also use the swing function to add a shuffle to your sequence.
Conclusion
Whether you prefer the graphical interface of the Piano Roll or the grid-based interface of the Step Sequencer, FL Studio provides a user-friendly way to record MIDI notes and sequences. With a little practice, you can easily create professional-quality patterns in no time.
Working with the Mixer and Effects
When recording patterns in FL Studio, it is important to understand how to work with the Mixer and Effects to achieve the desired sound. The Mixer is a crucial part of the software, as it allows you to control the levels and panning of each individual track, as well as apply effects to them.
Mixer Track
All audio in FL Studio passes through the Mixer, where it can be routed to different Mixer Tracks. Unless specifically directed, newly added Channels are routed to the Master Mixer Track. There are also Insert Tracks for receiving input from plugins and external audio inputs, as well as a Current Track for hosting tools like Edison and Wave Candy.
Levels and Pan
The Mixer allows you to control the levels and panning of each individual track. You can adjust the volume of each track by dragging the fader up or down. You can also adjust the panning of each track by dragging the pan knob left or right. This allows you to create a sense of space and depth in your recordings.
FX
The Mixer also allows you to apply effects to each individual track. To do this, you can click on the FX button on a Mixer Track and select an effect from the list. You can then adjust the parameters of the effect to achieve the desired sound. Some popular effects include reverb, delay, and distortion.
Master Mixer Track
The Master Mixer Track is where you can apply effects to the entire mix. This allows you to add a final layer of polish to your recordings. To apply an effect to the Master Mixer Track, simply click on the FX button on the Master Mixer Track and select an effect from the list.
understanding how to work with the Mixer and Effects is essential for recording patterns in FL Studio. By controlling the levels and panning of each individual track, applying effects, and using the Master Mixer Track, you can achieve a professional sound in your recordings.
Utilizing the Browser and Library
When it comes to recording patterns in FL Studio, the Browser and Library are two essential tools that can help you find the right samples, sounds, beats, loops, and instruments to create the perfect pattern. Here are some tips on how to use them effectively.
The Browser
The Browser is a powerful tool that allows you to browse through your files and folders, search for specific items, and preview them before you add them to your project. Here are some ways to use the Browser:
- Collapse structure: If you have a lot of folders open in the Browser, you can collapse them all at once by clicking on the “Collapse structure” button in the Options menu. This can help you keep your Browser organized and make it easier to find what you’re looking for.
- Refresh content: If you’ve added new files or folders to your project since you opened FL Studio, you can refresh the Browser to make sure they’re all visible. Just click on the “Refresh content” button in the Options menu.
- Search functions: The Browser also has several search functions that can help you find specific items quickly. You can search by name, type, or even by tags if you’ve added them to your files.
The Library
The Library is a collection of pre-made sounds, beats, and loops that you can use in your patterns. Here are some tips on how to use the Library:
- Preview sounds: You can preview any sound in the Library by clicking on it. This can help you find the right sound for your pattern without having to add it to your project first.
- Add to project: Once you’ve found the right sound, you can add it to your project by dragging it from the Library and dropping it into the Channel Rack.
- Organize sounds: You can also organize the sounds in the Library by creating your own folders and adding tags to your files. This can make it easier to find the right sound for your project.
By utilizing the Browser and Library effectively, you can save time and find the right samples, sounds, beats, loops, and instruments to create the perfect pattern in FL Studio.
Saving and Rendering Your Project
Once you’ve finished creating your pattern in FL Studio, it’s important to save your project. Saving your project ensures that you don’t lose any of your hard work in case of a power outage or computer crash. To save your project, simply go to File > Save or press Ctrl + S on your keyboard.
When you’re ready to share your pattern with others, you’ll need to render your project to an audio file. Rendering your project converts it from a FL Studio project file to an audio file that can be played on any device. To render your project, go to File > Export > Render to WAV file, or choose a different audio file format such as MP3 or OGG.
Before rendering, you’ll want to make sure that all of your tracks are armed for recording. This ensures that all of the audio in your project is captured in the rendered file. To arm a track for recording, simply click on the record button next to the track.
When you’re ready to render your project, make sure that the correct audio file format is selected and choose a location to save the file. You can also choose to normalize the audio, which adjusts the volume to a consistent level. Once you’re ready, click the render button to start the rendering process.
After rendering, you can listen to your audio file to make sure everything sounds the way you want it to. If you need to make any changes, simply go back to your FL Studio project and make the necessary adjustments before rendering again.
Remember to save your FL Studio project frequently while you work, and always render your project before sharing it with others. With these tips, you’ll be able to record and save your patterns in FL Studio like a pro!
Advanced Techniques
Once you’re comfortable with the basics of recording patterns in FL Studio, you can start exploring some more advanced techniques. Here are a few tips to help you take your pattern recording skills to the next level:
-
Automation: Use automation to add movement and variation to your patterns. You can automate parameters like filter cutoff, resonance, and envelope settings to create evolving soundscapes.
-
MIDI files: Import MIDI files into FL Studio to use as the basis for your patterns. You can also export your patterns as MIDI files to use in other programs or to share with other musicians.
-
Synthesizers: Experiment with different synthesizers to find the perfect sound for your patterns. FL Studio comes with a variety of built-in synthesizers, but you can also use third-party plugins for even more options.
-
External audio: Record external audio sources like guitars, vocals, and drums to add a human touch to your patterns. You can use FL Studio’s audio recording capabilities to capture these sounds and incorporate them into your patterns.
-
Microphone: Use a microphone to record sounds from your environment, like birds chirping or cars passing by. These sounds can add texture and atmosphere to your patterns.
-
Metronome: Use a metronome to keep your patterns in time. You can adjust the tempo and time signature to create complex rhythms and syncopations.
-
Automation clips: Use automation clips to create complex, evolving patterns. You can create automation clips for any parameter in FL Studio, and use them to create dynamic patterns that change over time.
-
Clip focus selector: Use the clip focus selector to quickly navigate between different patterns in your project. This can help you stay organized and focused as you work.
-
Mute selected: Use the “mute selected” function to quickly mute or unmute specific patterns in your project. This can be a useful tool for experimenting with different combinations of patterns.
-
Transpose: Use the transpose function to change the key of your patterns. This can be a useful tool for creating variations on a theme or for experimenting with different harmonies.
-
Restretch: Use the restretch function to change the tempo of your patterns without changing the pitch. This can be a useful tool for creating variations on a theme or for experimenting with different rhythms.
By using these advanced techniques, you can take your pattern recording skills to the next level and create truly unique and dynamic music.
Troubleshooting Common Issues
Recording patterns in FL Studio can be a fun and rewarding experience, but sometimes things can go wrong. Here are some common issues that you might encounter and how to troubleshoot them.
Manual Troubleshooting
If you are having trouble recording a pattern, the first thing you should do is consult the FL Studio manual. The manual is a great resource for troubleshooting common problems and learning more about the software’s features and functions.
Workflow Troubleshooting
If you are having trouble with your workflow, there are a few things you can try. First, make sure you are in track mode. This will allow you to add and edit patterns in the playlist. If you are having trouble muting or deleting patterns, make sure you are using the correct commands. You can mute a pattern by right-clicking on it and selecting “Mute,” or you can delete a pattern by selecting it and pressing the delete key. Finally, if you are having trouble with the color of your patterns, make sure you are using the correct color palette.
Track Mode Troubleshooting
If you are having trouble with track mode, there are a few things you can try. First, make sure you are in the correct mode. You can switch between pattern and song mode by clicking the appropriate button in the toolbar. If you are having trouble with the size or position of your patterns, try resizing or moving them using the mouse.
Mute Troubleshooting
If you are having trouble muting patterns, make sure you are using the correct command. You can mute a pattern by right-clicking on it and selecting “Mute.” If you are still having trouble, try muting the entire track or channel instead.
Delete Troubleshooting
If you are having trouble deleting patterns, make sure you are selecting the correct pattern and using the correct command. You can delete a pattern by selecting it and pressing the delete key. If you are still having trouble, try deleting the entire track or channel instead.
Color Troubleshooting
If you are having trouble with the color of your patterns, make sure you are using the correct color palette. You can change the color of a pattern by right-clicking on it and selecting “Color.” If you are still having trouble, try resetting the color palette to its default settings.
By following these troubleshooting tips, you should be able to overcome common issues when recording patterns in FL Studio. Remember to consult the manual and experiment with different settings and commands to find the workflow that works best for you.
Review and Final Thoughts
Recording patterns in FL Studio is an essential part of music production. It allows you to create unique melodies and beats that can be used in your tracks. In this article, we have covered the basics of recording patterns in FL Studio, including how to create a new pattern, how to record notes, and how to access the plugin picker.
FL Studio is a powerful DAW that offers a range of features for music production, mixing, and mastering. Whether you are using the Fruity Edition or the Producer Edition, you can create professional-sounding tracks with ease. The plugin picker is particularly useful for adding new sounds to your tracks, and the volume controls allow you to fine-tune your mix for optimal sound quality.
When it comes to production, FL Studio offers a streamlined workflow that allows you to focus on creating music rather than getting bogged down in technical details. The piano roll is intuitive and easy to use, and the step sequencer allows you to quickly create complex rhythms.
In terms of mixing, FL Studio offers a range of tools for EQ, compression, and other effects. The mixer is easy to navigate, and the ability to route tracks to different channels allows you to create a complex mix that sounds great on any system.
FL Studio is a great choice for anyone looking to produce high-quality music. Whether you are a beginner or an experienced producer, you will find that FL Studio offers everything you need to create professional-sounding tracks.


