Are you an aspiring music producer looking to mix your own vocals in FL Studio? Look no further! Mixing vocals can be a daunting task, but with the right techniques and tools, you can achieve a professional sound. In this article, we will go over some tips and tricks for mixing vocals in FL Studio.
First and foremost, it is important to have a clear understanding of the different elements that make up a vocal mix. These include the lead vocal, backing vocals, harmonies, and ad-libs. Each of these elements should be treated differently in the mix to ensure that they complement each other and create a cohesive sound. By understanding the role of each element, you can make informed decisions on how to process and mix them.
Additionally, selecting the right plugins and effects can make a huge difference in the final sound of your vocal mix. FL Studio comes with a variety of built-in plugins such as EQ, compression, and reverb, which can be used to shape and enhance your vocals. However, there are also many third-party plugins available that can take your vocal mix to the next level. By experimenting with different plugins and effects, you can find the perfect combination to make your vocals stand out in the mix.
Setting Up the Studio
Before you start mixing vocals in FL Studio, it’s important to make sure your studio is set up properly. Here are a few things to keep in mind:
Recording Vocals
First and foremost, you need to have a good recording of your vocals to work with. Make sure your recording space is quiet and free of any background noise. You can use a pop filter to reduce plosives and a reflection filter to minimize room noise. If you’re recording in a room with hard surfaces, you can also use acoustic panels to reduce echo and reverb.
Mic Selection
The microphone you use can have a big impact on the quality of your vocal recordings. There are a lot of different microphones out there, so it’s important to choose one that works well for your voice and the type of music you’re recording. Some popular options include the Shure SM7B, the Rode NT1-A, and the Audio-Technica AT4053B.
Mic Placement
Once you’ve chosen your microphone, it’s important to position it properly. The distance between the microphone and the vocalist can affect the tone and clarity of the recording. Generally, you want to place the microphone about 6-8 inches away from the vocalist’s mouth and slightly off to the side to avoid plosives. You can experiment with different mic placements to find the sweet spot for your voice.
FL Studio Setup
Now that you have a good recording of your vocals, it’s time to start mixing in FL Studio. Make sure your audio interface is properly connected and set up in FL Studio. You can check your settings by going to Options > Audio Settings. From there, you can select your audio interface and adjust your buffer size to minimize latency.
Conclusion
By following these tips, you can set up your studio for successful vocal mixing in FL Studio. Remember to take your time and experiment with different techniques to find what works best for your voice and music.
Recording Vocals
Recording vocals is a crucial step in producing a high-quality mix. Here are some tips to ensure you capture the best possible take:
-
Choose the right microphone: Selecting the right microphone for the vocalist and the style of music is essential. A condenser microphone is a popular choice for recording vocals in FL Studio, but dynamic microphones can also work well for certain genres.
-
Set up your recording environment: It’s important to record in a quiet space to minimize background noise. Consider using acoustic treatment to reduce reflections and echoes in the room. You can also use a noise gate plugin in FL Studio to remove unwanted noise during the recording process.
-
Take your time: Encourage the vocalist to relax and take their time during the recording process. It’s better to capture a few great takes than to rush through and end up with a subpar recording.
-
Check the noise profile: Before recording, use FL Studio’s de-noise tool to analyze the noise profile of the recording environment. This can help you identify any problem areas and adjust accordingly.
-
Edit as needed: After recording, listen back to the takes and edit as needed. Use FL Studio’s tools to adjust the timing, pitch, and volume of the recording to ensure it fits seamlessly into the mix.
By following these tips, you can capture a high-quality vocal recording that will elevate your mix to the next level.
Understanding the Interface
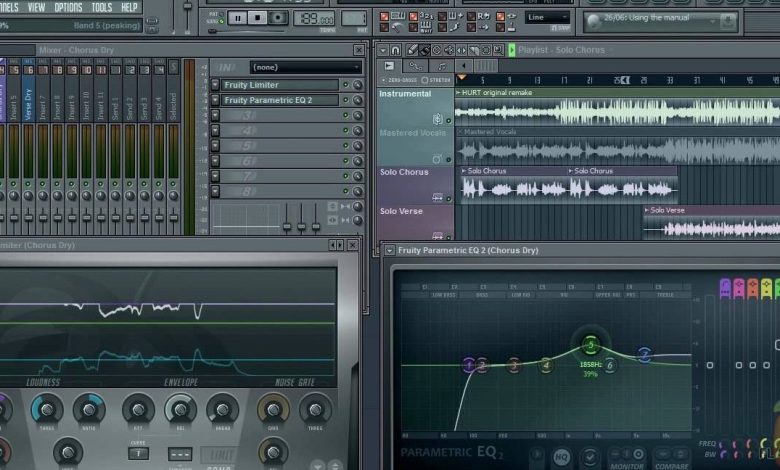
FL Studio 20 is a Digital Audio Workstation (DAW) that provides an intuitive interface for mixing vocals. The interface consists of several windows, including the Browser, Playlist, Mixer, Piano Roll, and Step Sequencer.
The Browser is where you can access your files, samples, and plugins. It allows you to preview and drag and drop files directly into the Playlist or Mixer. The Browser is a powerful tool that can save you a lot of time when searching for the right sounds.
The Playlist is where you arrange your audio and MIDI clips to create your song. You can add effects, automation, and patterns to each track. The Playlist also allows you to group tracks together and adjust the volume, panning, and routing of each track.
The Mixer is where you can mix your tracks and apply effects to them. Each track has its own channel in the Mixer, which allows you to adjust the volume, panning, and effects of each track individually. You can also add inserts and sends to each track to apply additional effects.
The Piano Roll is where you can edit your MIDI notes. You can create melodies, chords, and basslines using the Piano Roll. You can also adjust the velocity, length, and timing of each note.
The Step Sequencer is where you can create drum patterns and loops. You can use the Step Sequencer to program beats and rhythms using a grid-based interface.
Understanding the interface is essential for mixing vocals in FL Studio 20. By familiarizing yourself with the Browser, Playlist, Mixer, Piano Roll, and Step Sequencer, you can create professional-sounding mixes with ease.
Selecting and Using the Right Tools
When it comes to mixing vocals in FL Studio, selecting and using the right tools is crucial. Here are some of the essential tools you should consider:
Compressor
A compressor is a must-have tool for mixing vocals. It helps to even out the levels of the vocal track, making it sound more polished. Use a compressor to control the dynamic range of the vocals and make them sit better in the mix.
Fruity Limiter
The Fruity Limiter is another useful tool for mixing vocals. It can help to control the peaks of the vocal track and prevent distortion. Use it to set a ceiling on the level of the vocals and keep them from getting too loud.
Fruity Parametric EQ 2
The Fruity Parametric EQ 2 is an equalizer that allows you to adjust the frequency response of the vocals. Use it to remove unwanted frequencies and enhance the desirable ones. This tool can help to make the vocals sound clearer and more defined.
Maximus
Maximus is a multiband compressor that allows you to control the levels of different frequency bands independently. Use it to compress the vocals in a more targeted way, making them sound more natural and transparent.
Equalizer
An equalizer is a tool that allows you to adjust the balance of frequencies in the vocal track. Use it to shape the tone of the vocals and make them fit better in the mix. Be careful not to overdo it, as excessive EQ can make the vocals sound unnatural.
De-essing
De-essing is a technique used to reduce the harshness of sibilant sounds (such as “s” and “sh”) in the vocals. Use a de-esser plugin to tame these sounds and make the vocals sound smoother.
Pitch Correction
Pitch correction is a tool that allows you to correct the pitch of the vocals if they are out of tune. Use it sparingly to fix minor pitch issues and make the vocals sound more polished.
By selecting and using the right tools, you can achieve a professional-sounding vocal mix in FL Studio. Experiment with these tools to find the best settings for your vocals and make them shine in your mix.
Mixing Basics
Mixing is the process of combining individual audio tracks to create a balanced and cohesive sound. It’s a crucial step in music production that can make or break a song. Mixing vocals in FL Studio can be challenging, but with some basic knowledge, you can achieve professional-sounding results.
Here are some essential mixing basics to keep in mind when working with vocals in FL Studio:
Gain Staging
Gain staging is the process of setting the levels of each track in your mix to ensure that they are not too loud or too quiet. It’s important to avoid clipping and distortion, which can ruin your mix.
To properly set the gain, start by setting the fader of each track to 0 dB. Then, play the entire mix and adjust the gain of each track until they are all at an appropriate level.
EQ
Equalization, or EQ, is the process of adjusting the frequency balance of each track in your mix. It’s important to remove any unwanted frequencies and boost the ones that enhance the sound.
When mixing vocals, focus on the midrange frequencies between 1 kHz and 5 kHz. This is where the clarity and presence of the vocals reside. Use a parametric EQ to cut out any unwanted low-end rumble or high-end hiss.
Compression
Compression is the process of reducing the dynamic range of a track by reducing the volume of the loudest parts. It’s essential for controlling the dynamics of vocals and making them sit well in the mix.
When compressing vocals, start with a low ratio of around 2:1 and a medium attack and release time. Adjust the threshold until the compressor is working consistently. Be careful not to over-compress, as this can make the vocals sound unnatural.
Reverb and Delay
Reverb and delay are time-based effects that can add depth and space to your mix. They can also help vocals sit better in the mix and create a sense of cohesion.
When using reverb and delay on vocals, start with a small amount and adjust to taste. Use a short delay time for a slap-back effect or a longer delay time for a more pronounced echo. Be careful not to overdo it, as too much reverb or delay can make the vocals sound distant or muddy.
Panning
Panning is the process of placing each track in the stereo field. It can help create a sense of space and separation between instruments.
When panning vocals, avoid hard panning them to one side. Instead, pan them slightly to the left or right to create a sense of width. You can also use panning to create a call-and-response effect between different vocal tracks.
By following these mixing basics, you can achieve a professional-sounding mix of vocals in FL Studio. Remember to take your time and experiment with different techniques to find what works best for your mix.
Working with Tracks
When mixing vocals in FL Studio, it’s important to understand how to work with tracks. Tracks are the individual audio channels that make up your project. In FL Studio, you can have multiple tracks for each instrument or vocal, allowing you to adjust the levels and effects for each track independently.
To create a new track, simply right-click on the Playlist and select “Insert” > “Audio Track”. You can then drag and drop your vocal or instrumental onto the new track. Once you have your tracks set up, you can start adjusting the levels and panning to create a balanced mix.
It’s important to keep your tracks organized by labeling them appropriately. You can do this by right-clicking on the track and selecting “Rename”. This will help you keep track of which track is which, especially when working with multiple instruments or vocals.
When mixing vocals, it’s important to pay attention to the levels of each track. You want to make sure that the vocals are not too loud or too quiet in relation to the instrumental tracks. You can adjust the levels of each track by using the mixer in FL Studio.
In addition to adjusting levels, you can also add effects to each track to enhance the sound. For example, you can add reverb to a vocal track to make it sound like it was recorded in a larger space. You can also add EQ to each track to adjust the frequency balance and make sure that each instrument or vocal is sitting in the right frequency range.
working with tracks is an essential part of mixing vocals in FL Studio. By organizing your tracks, adjusting the levels, and adding effects, you can create a balanced and professional-sounding mix.
Applying Effects
Now that you have adjusted the levels and panning of your vocal tracks, it’s time to add some effects to make them sound even better. Here are some commonly used effects in FL Studio:
Reverb
Reverb adds a sense of space and depth to your vocals. It simulates the sound of a room or hall and can make your vocals sound more natural. You can adjust the reverb time, pre-delay, and wet/dry mix to achieve the desired effect. Be careful not to overdo it, as too much reverb can make your vocals sound muddy.
Delay
Delay is an effect that creates an echo-like effect by repeating the vocal signal after a certain amount of time. It can add depth and interest to your vocals, and can be adjusted to create different rhythmic patterns. You can adjust the delay time, feedback, and wet/dry mix to achieve the desired effect.
Vocal Effects
There are many different vocal effects that you can use to add character and interest to your vocals. Some popular effects include distortion, chorus, and flanger. These effects can be used to create unique vocal sounds and can be adjusted to fit the style of your song.
When applying effects, it’s important to use them in moderation and to adjust them to fit the style of your song. Be creative and experiment with different settings to find the perfect sound for your vocals. Remember, the goal is to enhance your vocals, not to overpower them with effects.
Equalization Techniques
Equalization is a crucial tool to achieve a balanced and polished vocal mix. By adjusting the levels of specific frequencies, you can enhance the clarity and presence of the vocals and make them stand out in the mix. Here are some equalization techniques to help you achieve a professional-sounding vocal mix in FL Studio:
High-Pass Filter
A high-pass filter is a type of equalizer that attenuates or cuts off the low-frequency content of a signal. It is an essential tool to clean up the vocals and remove unwanted rumble and noise. In FL Studio, you can use the Fruity Parametric EQ 2 plugin to apply a high-pass filter to the vocals. Start by setting the frequency to around 100 Hz and adjust the slope to your liking. Be careful not to cut off too much low-end as it can make the vocals sound thin and weak.
Lows
The low frequencies of the vocals can add warmth and depth to the mix, but too much of it can make the mix muddy and undefined. To balance the lows, use a low-shelf filter to boost or cut the frequencies below a certain point. In FL Studio, you can use the Fruity Parametric EQ 2 plugin to adjust the lows. Start by setting the frequency to around 200 Hz and adjust the gain to your liking.
Mids
The mid frequencies of the vocals contain the fundamental and overtone frequencies that give the vocals their character and presence. To enhance the midrange, use a mid-range filter to boost or cut the frequencies around a certain point. In FL Studio, you can use the Fruity Parametric EQ 2 plugin to adjust the mids. Start by setting the frequency to around 2 kHz and adjust the gain to your liking.
Highs
The high frequencies of the vocals contain the sibilance and air that give the vocals their clarity and brightness. To enhance the highs, use a high-shelf filter to boost or cut the frequencies above a certain point. In FL Studio, you can use the Fruity Parametric EQ 2 plugin to adjust the highs. Start by setting the frequency to around 8 kHz and adjust the gain to your liking.
Experimentation
Equalization is not an exact science, and every vocal mix is different. Therefore, it’s essential to experiment with different equalization techniques to find the right balance for your mix. Don’t be afraid to try different EQ settings, and always trust your ears. Remember, the goal of equalization is to enhance the vocals and make them sound natural and balanced in the mix.
Compression Techniques
Compression is a crucial technique when it comes to mixing vocals in FL Studio. It helps to control the dynamic range of the vocals, making them sound more polished and balanced. Here are some compression techniques that you can use to enhance your vocal mixing skills:
Ratio
The ratio is the amount of gain reduction that occurs when the signal exceeds the threshold level. A higher ratio means more compression, while a lower ratio means less compression. A good starting point for vocals is a ratio of 3:1 to 4:1. However, depending on the vocal performance, you may need to adjust the ratio accordingly.
Threshold
The threshold is the level at which compression begins. It determines the point at which the compressor starts to reduce the volume of the signal. A lower threshold means more compression, while a higher threshold means less compression. When setting the threshold, make sure that it is low enough to catch the peaks of the vocal performance but high enough to avoid over-compression.
Attack
The attack determines how quickly the compressor starts to reduce the volume of the signal after it exceeds the threshold level. A faster attack means that the compressor will start to reduce the volume of the signal immediately, while a slower attack means that it will take longer to start reducing the volume. For vocals, a moderate attack time of around 10-30ms is a good starting point.
Release
The release determines how quickly the compressor stops reducing the volume of the signal after it falls below the threshold level. A faster release means that the compressor will stop reducing the volume of the signal immediately, while a slower release means that it will take longer to stop reducing the volume. For vocals, a moderate release time of around 100-200ms is a good starting point.
Compressors
FL Studio has several compressor plugins that you can use for vocal mixing, including Fruity Limiter, Fruity Compressor, and Fruity Multiband Compressor. Each compressor plugin has its own unique features and settings, so it’s important to experiment with different compressors to find the one that works best for your vocal mix.
compression is a powerful tool that can help you achieve a professional-sounding vocal mix in FL Studio. By adjusting the ratio, threshold, attack, release, and using the right compressor plugin, you can control the dynamic range of the vocals and make them sound more polished and balanced.
Mastering the Mix
Once you have mixed your vocals to your satisfaction, the next step is mastering the mix. Mastering is the process of preparing your mix for distribution by making sure it sounds good on all playback systems. Here are some tips for mastering your vocal mix in FL Studio:
Set the Master Gain
Before you start mastering, make sure the master gain is set to 0 dB. This will ensure that you are not adding any unnecessary gain to the mix. You can adjust the gain using the Fruity Limiter plugin or the Fruity Balance plugin.
Adjust the Loudness
The loudness of your mix is important, as it can affect how your mix sounds on different playback systems. You can use the Fruity Compressor plugin to adjust the loudness of your mix. Set the threshold to -6 dB and the ratio to 2:1. This will help to even out the levels of your mix.
Normalize the Mix
Normalization is the process of adjusting the gain of your mix so that the loudest part of the mix is at 0 dB. This can be done using the Fruity Limiter plugin. Set the ceiling to -0.3 dB and the gain to 0 dB. This will ensure that your mix is not too quiet or too loud.
Use a Mastering Plugin
There are many mastering plugins available in FL Studio that can help you to enhance your mix. Some popular plugins include the Fruity Multiband Compressor, the Fruity Parametric EQ 2, and the Fruity Stereo Shaper. These plugins can help you to adjust the EQ, stereo image, and compression of your mix.
mastering your vocal mix is an important step in the production process. By following these tips, you can ensure that your mix sounds good on all playback systems. Remember to take your time and experiment with different plugins and settings to find the best sound for your mix.
Avoiding Common Mistakes
Mixing vocals can be a challenging task, especially for beginners. Here are some common mistakes to avoid when mixing vocals in FL Studio:
Mistakes to Avoid
-
Overcompressing: Overcompressing your vocal tracks can lead to a loss of dynamics and a flat, lifeless sound. Be sure to use compression sparingly and adjust the settings carefully to avoid this issue.
-
Lack of Volume Automation: Failing to automate the volume of your vocal tracks can lead to inconsistencies in the mix. Use volume automation to adjust the levels of your vocals throughout the track, particularly during quieter sections.
-
Sibilance: Sibilance refers to the harsh “s” and “sh” sounds that can be present in vocal recordings. Use a de-esser plugin to reduce sibilance and achieve a smoother, more natural sound.
-
De-noising: Background noise can be a major issue when recording vocals. Use a de-noising plugin to remove unwanted noise and improve the clarity of your vocal tracks.
-
Low Band: Boosting the low end of your vocal tracks can add warmth and depth to your mix. However, be careful not to overdo it, as too much low-end can result in a muddy, indistinct sound.
-
Spectrum: Pay attention to the frequency spectrum of your vocal tracks. Use EQ to cut out any unwanted frequencies and enhance the clarity and presence of your vocals.
By avoiding these common mistakes, you can achieve a more professional-sounding mix and take your vocal recording to the next level.
Enhancing the Vocals
Once you have your vocal mix set up, it’s time to enhance the vocals to make them stand out in the mix. Here are a few tips to help you achieve this:
1. Focus on the Lyrics
The lyrics are the heart of the song, so it’s important to make sure they are heard clearly. One way to do this is to use EQ to boost the frequencies that the vocals occupy, while cutting out any frequencies that clash with the vocals. This will help the vocals cut through the mix and be heard clearly.
2. Highlight the Chorus
The chorus is often the most memorable part of the song, so you want to make sure it stands out. One way to do this is to use automation to increase the volume of the vocals during the chorus. You can also add some reverb or delay to the vocals during the chorus to create a sense of space and make them sound more epic.
3. Enhance the Melody
The melody is what makes the song catchy, so you want to make sure it shines. One way to do this is to use pitch correction to make sure the vocals are in tune. You can also use harmonies to add depth and richness to the vocals, or add some vocal chops to create a unique sound.
4. Improve Sound Quality
The sound quality of the vocals is crucial, so it’s important to make sure they sound as good as possible. One way to do this is to use a de-esser to remove any harsh sibilance sounds. You can also use compression to even out the volume of the vocals and make them sound more polished. Finally, adding some subtle saturation or distortion can add warmth and character to the vocals.
By following these tips, you can enhance the vocals in your mix and make them stand out in the best possible way.
Using Presets and Samples
Using presets and samples can be a great way to speed up your vocal mixing process in FL Studio. Presets are pre-made settings that can be applied to your vocal tracks, while samples are pre-recorded sounds that can be used to enhance your vocals. Here are some tips on how to use presets and samples effectively in your vocal mixing process.
Presets
Presets can be a great starting point for your vocal mixing process. They can save you time and help you achieve a more professional sound. However, it’s important to remember that presets are not a one-size-fits-all solution. You may need to tweak the preset settings to fit your specific vocal track.
When using presets, it’s important to choose a preset that matches the genre and style of your vocal track. For example, if you’re mixing a rap vocal, you may want to choose a preset that has a lot of compression and a high-pass filter to cut out low frequencies. On the other hand, if you’re mixing a pop vocal, you may want to choose a preset that has less compression and more reverb.
Samples
Samples can be used to add texture and depth to your vocal tracks. They can be used to create vocal harmonies, add vocal chops, or create vocal effects. When using samples, it’s important to choose samples that match the key and tempo of your vocal track.
You can find samples in a variety of places, including sample packs and online libraries. When choosing samples, it’s important to listen to them in the context of your vocal track to make sure they fit well.
In addition to using pre-made samples, you can also create your own samples by recording your own vocals and manipulating them in FL Studio. This can be a great way to add a personal touch to your vocal tracks and create unique sounds.
Conclusion
Using presets and samples can be a great way to speed up your vocal mixing process and add depth to your vocal tracks. However, it’s important to choose presets and samples that fit the genre and style of your vocal track, and to tweak them as needed. By using presets and samples effectively, you can create professional-sounding vocal mixes in FL Studio.
Music Production Tips
When it comes to music production, there are a few tips that can help you achieve a better overall sound. These tips can be applied to any genre of music, and can make a big difference in the final result.
Firstly, it’s important to have a clear understanding of the singer’s voice. This means listening carefully to their tone, pitch, and timbre, and adjusting the mix accordingly. It’s also important to blend the vocals with the rest of the instruments in the track, so that they don’t sound too isolated or out of place.
Secondly, it’s important to use the right tools and effects to enhance the vocals. This can include EQ, compression, reverb, and delay. Each of these effects can be used to shape the sound of the vocals in different ways, and can help to create a more polished and professional sound.
Finally, it’s important to pay attention to the overall balance of the mix. This means making sure that each instrument and element in the track is given the right amount of space and attention. It’s also important to make sure that the vocals are not too loud or too quiet in relation to the rest of the track, as this can affect the overall impact of the song.
By following these music production tips, you can create a more cohesive and professional sounding mix, and help to bring out the best in the singer’s voice.