GarageBand is a popular digital audio workstation that allows users to create music and podcasts on their Mac computers. One of the essential features of GarageBand is the ability to select an input source, such as a microphone or guitar, to record audio. This feature is crucial for producing high-quality recordings that sound professional.
In this article, we will explore how to select an input source in GarageBand. We will cover the steps required to choose the input source for your microphone or guitar, as well as other devices like USB interfaces. By following these steps, you can ensure that your recordings sound crisp and clear, without any unwanted background noise or distortion. Whether you are a beginner or an experienced user, this guide will help you get the most out of GarageBand’s input source selection feature.
Understanding Garageband
Garageband is a digital audio workstation that is exclusive to Apple’s macOS and iOS operating systems. It is a popular tool for musicians and podcasters to record, edit, and produce audio content. Garageband comes pre-installed on all new Macs and is available for free on the App Store.
When you open Garageband, you will be presented with a variety of options to choose from, including creating a new project, opening an existing project, or choosing a template. Once you have chosen an option, you will be taken to the main interface of Garageband.
The main interface of Garageband is divided into several sections, including the control bar, the timeline, the track headers, and the library. The control bar contains various controls for playing, recording, and editing audio. The timeline is where you can arrange and edit audio clips. The track headers allow you to add and manage audio tracks. The library contains a vast collection of loops, samples, and virtual instruments that you can use to create music.
Before you can start recording audio in Garageband, you need to set up your input source. This is the device that Garageband will use to capture audio, such as a microphone or guitar. To choose your input source, click on the “Setup” button in the upper-right corner of the lesson window. From there, you can select your input source from the drop-down menu.
In addition to selecting your input source, you can also change other audio and MIDI settings in Garageband. To access these settings, click on the “Garageband” menu and choose “Settings,” then click on “Audio/MIDI.” Here, you can choose your output device, enable Audio Units plug-ins, and reset MIDI drivers.
Garageband is a powerful and user-friendly tool for recording and producing audio content on your Mac. With its intuitive interface and extensive library of sounds, Garageband is an excellent choice for both beginners and professionals.
Selecting an Input Source
When recording audio in GarageBand, selecting the correct input source is crucial. An input source is the audio input device that you will use to record your audio. It can be an external microphone, a built-in microphone, or an audio interface connected via USB.
To select an input source, click on the “Input Source” button in the control bar. The input source button looks like a microphone icon. Once you click on it, a drop-down menu will appear, showing all the available input sources.
If you have more than one input device connected, you will see multiple options in the drop-down menu. You can select the desired input source by clicking on it.
It is important to ensure that the input source you select is properly connected and configured. If you are using an external microphone, make sure it is plugged into the correct input port on your computer or audio interface. If you are using a built-in microphone, make sure it is not muted and that the input level is set correctly.
Once you have selected your input source, you can adjust the input level using the input level slider. The input level slider is located in the track header and can be adjusted by dragging the slider up or down. You can also monitor the input level using the level meter, which is located next to the input level slider.
If you are recording in stereo, you can select the input channel by clicking on the channel button. The channel button is located next to the input level slider and shows the current channel number. You can switch between the left and right channel by clicking on the channel button.
selecting the correct input source is crucial for recording high-quality audio in GarageBand. Make sure your input device is properly connected and configured, and adjust the input level as needed using the input level slider and level meter.
Connecting Your Instrument
Connecting your instrument to GarageBand is easy, and there are a few different options depending on the type of instrument you have. Here are some steps to follow:
Acoustic Guitar
If you’re playing an acoustic guitar and using your computer’s built-in microphone, you can choose “Internal Mic” from the “My Input Device” pop-up menu at the top of the window. However, if your guitar is not equipped with a pickup, you may want to consider using an external microphone to get the best sound quality.
USB Microphone
If you’re using a USB microphone, you can connect it to your computer and set it as the input source for GarageBand. To do this, go to “Settings” > “Audio/MIDI” > “Devices” and select your USB microphone from the list of available devices.
Other Instruments
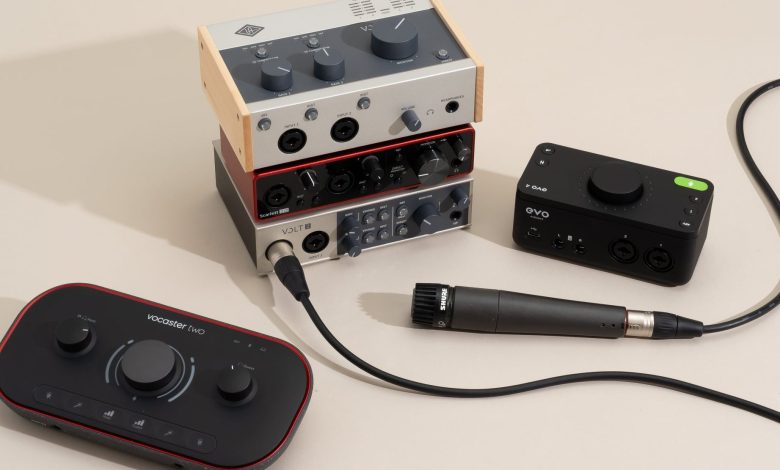
For other instruments, such as electric guitars or keyboards, you will need to connect them to your computer using an audio interface. Once you have connected your instrument to the audio interface, you can set the input source in GarageBand by selecting the appropriate input from the “My Input Device” pop-up menu.
Tips for Better Sound Quality
To get the best sound quality when recording your instrument, here are some tips to keep in mind:
- Use a high-quality cable to connect your instrument to your computer or audio interface.
- Make sure your instrument is in tune before recording.
- Position your microphone or instrument in a quiet location to minimize background noise.
- Experiment with microphone placement to find the best sound.
- Use headphones to monitor your recording to avoid feedback.
By following these tips and selecting the appropriate input source for your instrument, you can get great results when recording in GarageBand.
Setting Up for Recording
Before you start recording in GarageBand, it’s important to make sure that everything is set up correctly. This includes selecting the right input source, adjusting the input volume level, and setting up monitoring for the track. Here’s how to do it:
Choosing the Input Source
The first step in setting up for recording is to choose the input source. This is the device that you will be using to record your audio, whether it’s a microphone or an instrument. To do this, click on the Setup button in the upper-right corner of the lesson window. From there, you can select the input source for your guitar or microphone.
Adjusting the Input Volume Level
Once you’ve selected your input source, it’s important to adjust the input volume level. This will ensure that your recording is not too quiet or too loud. To do this, select the audio track you want to record to, or add an audio track if you haven’t already. Then, set the input volume level using the Smart Controls window. You can also adjust the volume using the Monitor pop-up menu.
Setting Up Monitoring
Monitoring is an important part of the recording process. It allows you to hear what you’re recording in real-time, so you can make adjustments as needed. To set up monitoring, click on the Monitor button in the control bar. From there, you can choose to monitor through your headphones or speakers. Be sure to adjust the volume level to avoid feedback.
Recording
Once you’ve set up everything, you’re ready to start recording. Simply click the Record button in the control bar and begin playing or singing. You can edit your recording later if needed.
By following these steps, you can ensure that your recording session in GarageBand goes smoothly and produces high-quality results.
Troubleshooting Common Issues
GarageBand is an excellent tool for musicians and podcasters alike, but sometimes things can go wrong. Here are some common issues you might encounter when selecting an input source in GarageBand and how to fix them.
Distortion or Clipping
If you hear distortion or clipping in your recordings, it could be because the input level is too high. To fix this, lower the input level in the Smart Controls section of GarageBand. You can also try moving further away from the microphone or turning down the volume on your guitar or other instrument.
GarageBand Not Responding
Sometimes GarageBand can freeze or stop responding. If this happens, try restarting the program. If that doesn’t work, try restarting your computer. You can also try deleting the GarageBand preferences file by going to ~/Library/Preferences and deleting the file com.apple.garageband10.plist.
No Input Source Selected
If you see a message that says “No Input Source Selected” when you try to record, it could be because GarageBand doesn’t have permission to use your microphone. You can fix this by going to System Preferences > Security & Privacy > Privacy and enabling the checkbox next to GarageBand.
Lesson Window Not Showing Input Source
If you’re in a lesson in GarageBand and the input source isn’t showing up, try clicking on the Setup button in the upper-right corner of the lesson window. From there, you can choose your input source from the My Input Device pop-up menu.
MacBook Built-in Microphone Not Working
If you’re using a MacBook and the built-in microphone isn’t working, try going to GarageBand > Preferences > Audio/MIDI and choosing Built-in Microphone from the Input Device pop-up menu. If that doesn’t work, try restarting your computer.
selecting an input source in GarageBand is a straightforward process, but sometimes things can go wrong. By following these troubleshooting tips, you should be able to fix most common issues and get back to making music or recording your podcast in no time.